August 26, 2013
Salesforce.com’s new offering, Salesforce Communities™ provides a great external support platform, helping organizations engage their customers, partners, suppliers, and distributors. By combining a customer interaction forum with internal business processes, companies are able to give their customers and partners the right information and connect them with the appropriate experts. Since its launch in May, there has been a lot of excitement around the Salesforce Communities product, but also a lack of detailed instructions on its setup process. This guide gives you a step-by-step tutorial on how to deploy Salesforce Communities in your organization. Let’s get started!
Prerequisites
First, check that your current Salesforce solution includes Communities. Depending on the current features of your Salesforce instance, you may need to pay for Salesforce Communities activation. If you are currently using Salesforce Portals, generally you will be grandfathered into the Communities offering. Individual Communities licenses are not included in the activation cost.
- From Setup, click Company Profile > Company Information. Your licenses are listed near the bottom of the page.
If you do not see a Communities option in your Setup menu, reach out to your Salesforce Account Executive for activation.
Enable
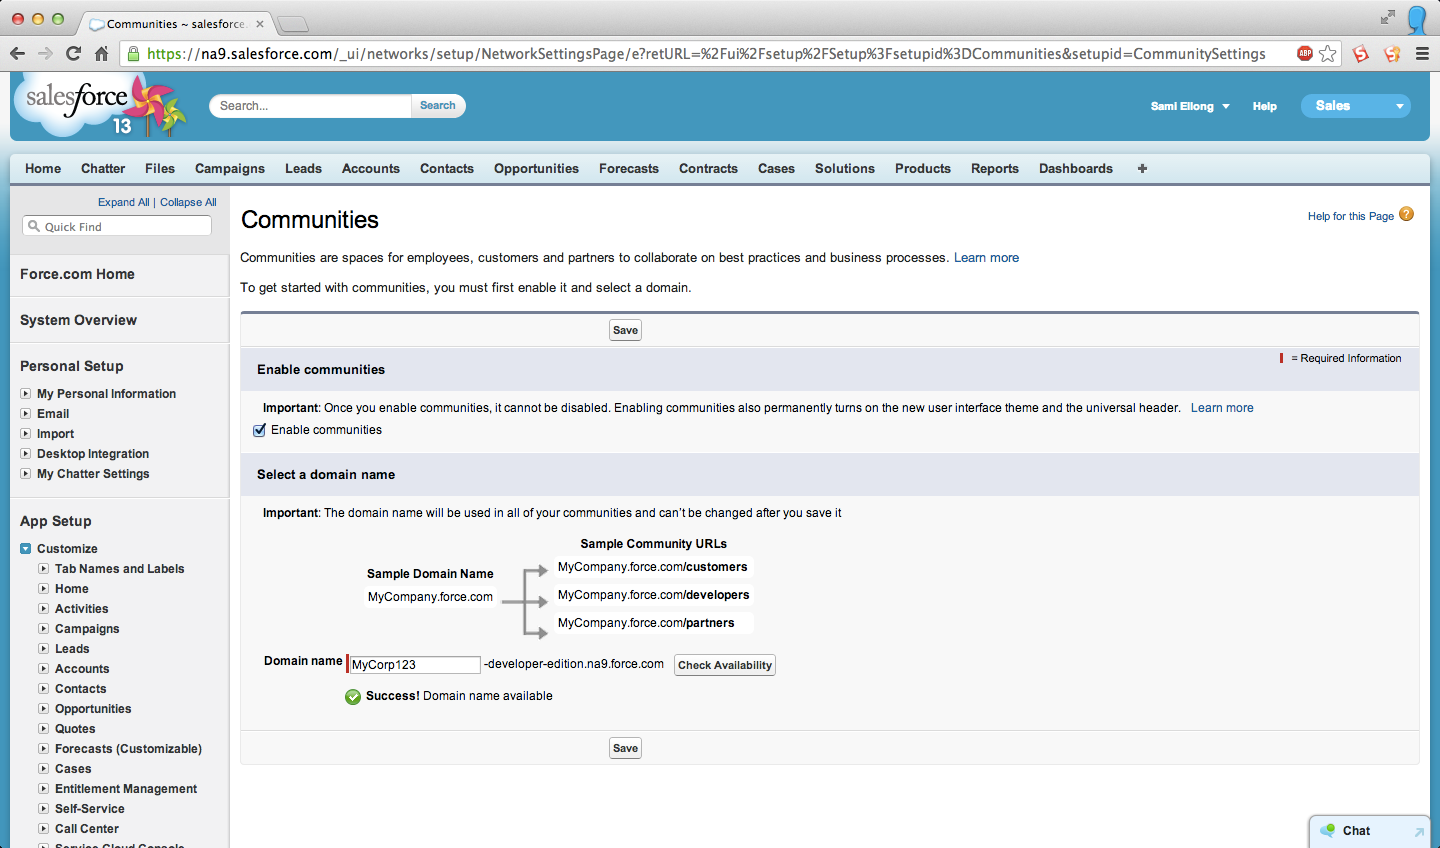
The first step is to enable Communities in your org.
- From Setup, click Customize > Communities > Settings.
- Select Enable Communities
- Select a domain name to use for your communities, then click Check Availability to make sure it’s not already being used.
- Salesforce suggests that you use something recognizable to your users, such as your company name.
- The domain name is the same for all communities, but you create a unique URL for each community during the creation process.
- Click Save.
After enabling the Community, you will notice that a new Global Header has been added to the User Interface.
• This header is visible to every user in your organization and allows users to quickly switch from one Community to another.
• The header can only be hidden by using custom profiles.
Create
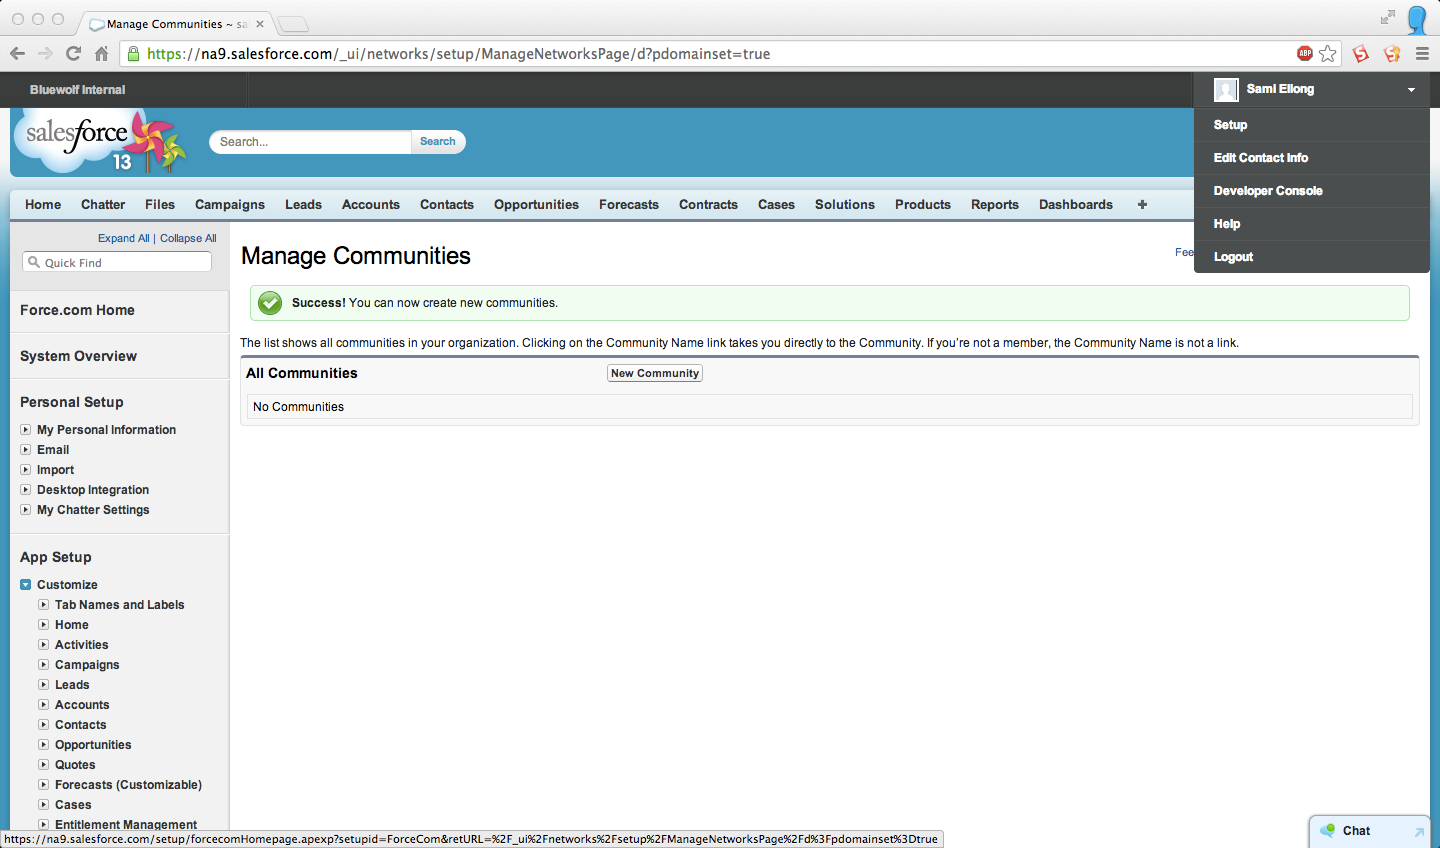
Once Communities have been enabled, you can now start creating Communities.
- From Setup, click Customize > Communities > Manage Communities, then click New Community.
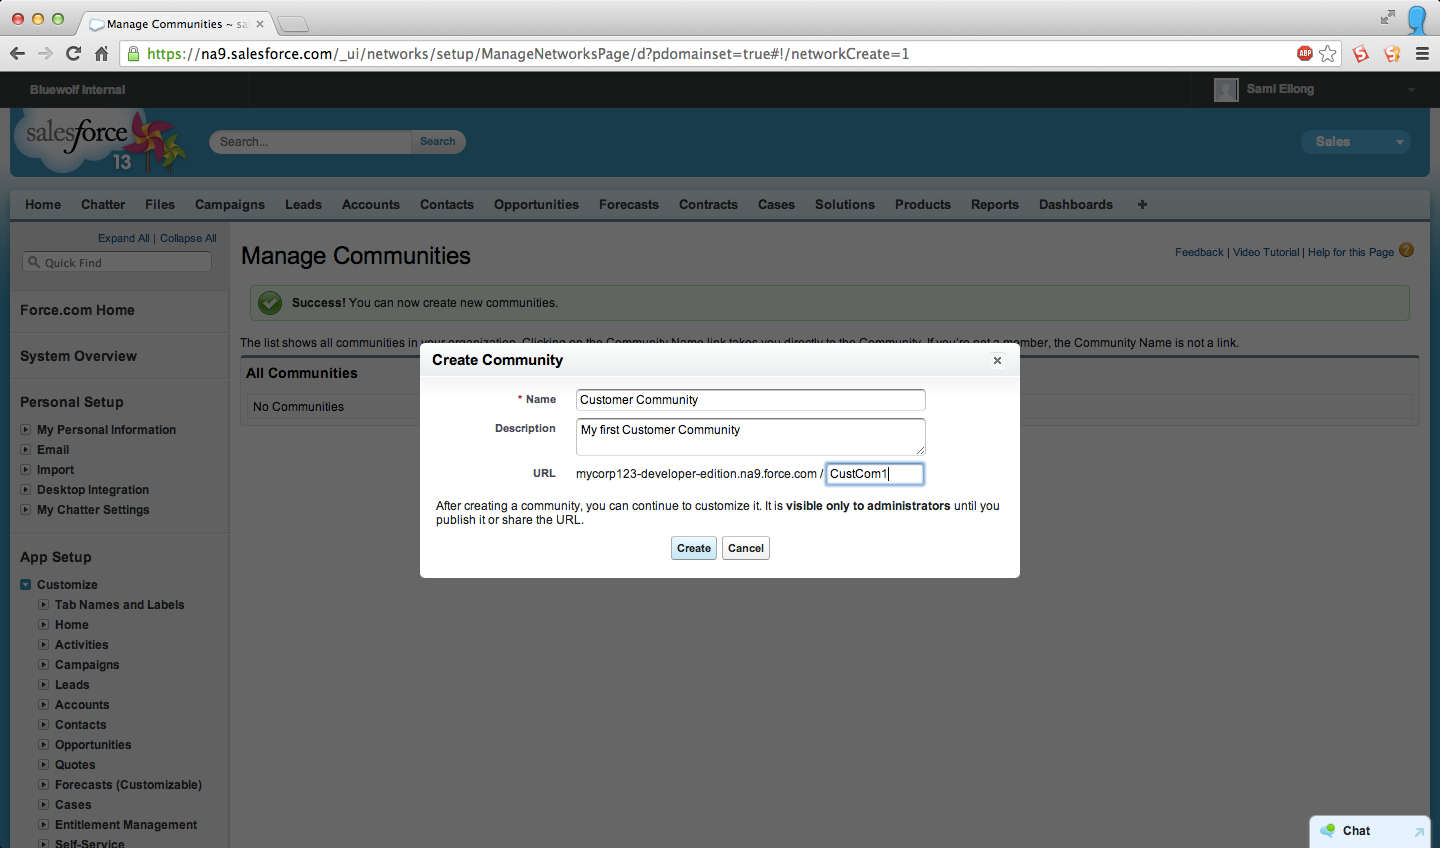
- Enter a Community name.
- The Global Header only displays the first 32 characters of the name. Make sure the visible part of the name is distinct enough for users to distinguish between multiple communities.
- Enter a description.
- Enter a unique value at the end of the URL field.
- Click Create.
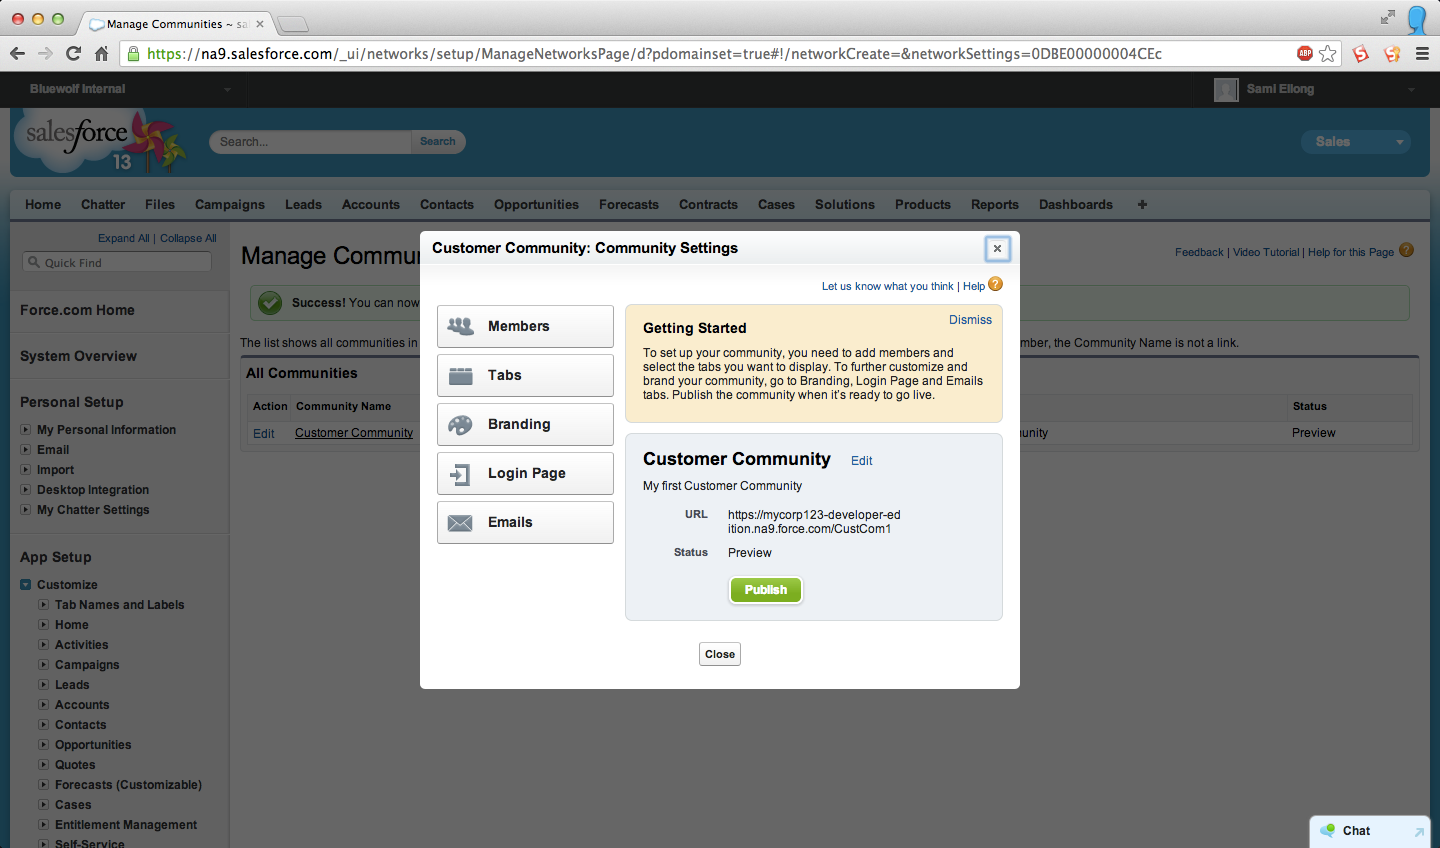
Once a Community is created, it is assigned a “Preview” status. Communities can have the following statuses:
- Preview: Customization of the community isn’t complete, and it has never been published. Once you publish, you can’t go back to Preview status.
- Published: The community is published and available to members.
- Offline: The community was previously published but was taken offline.
Customize and Brand
Now it’s time to customize and brand your Community. This process has been simplified and improved compared to the old Portals.
These five steps will allow you to shape the user’s experience.
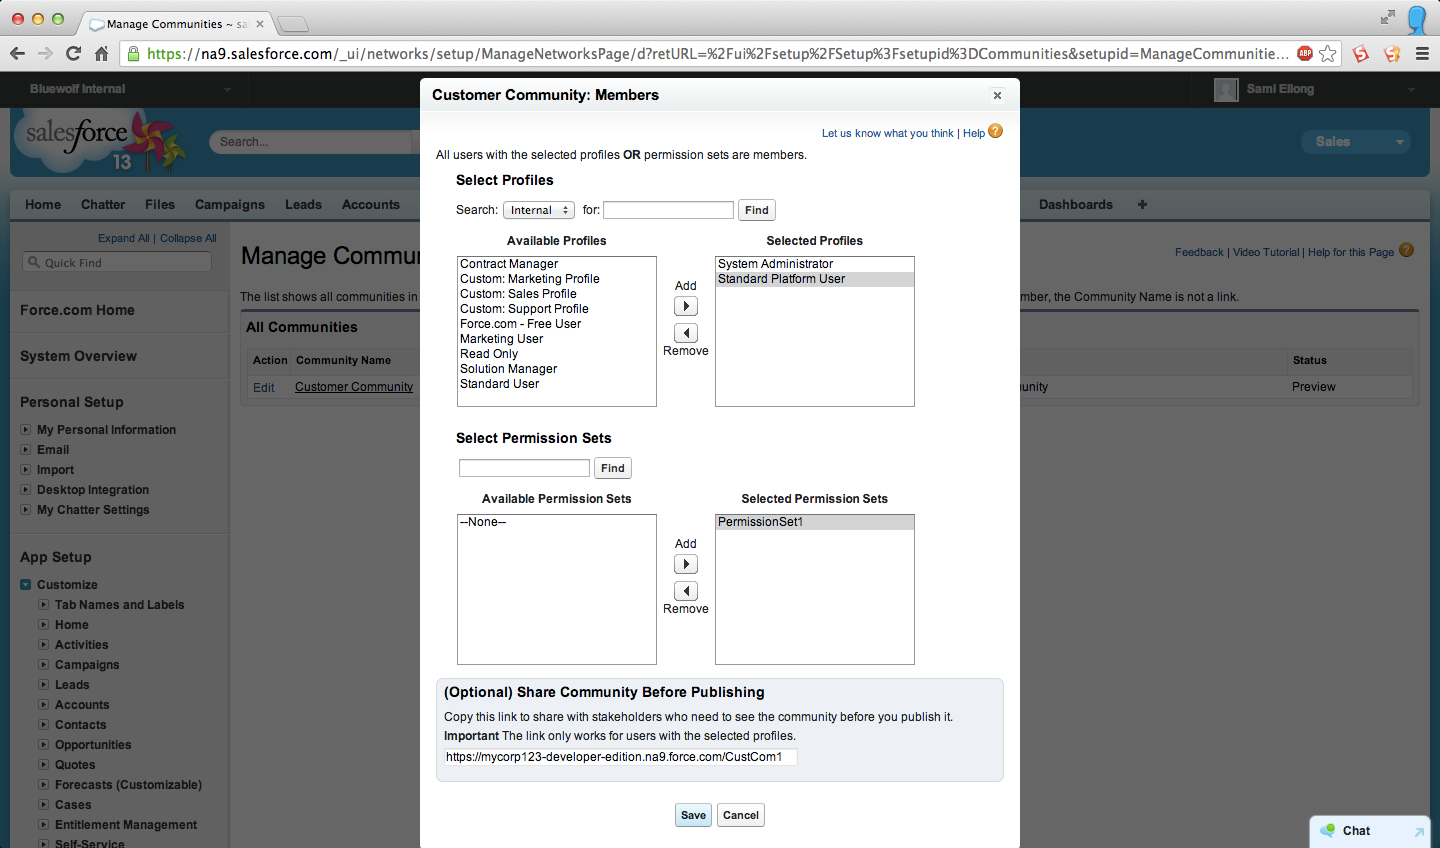
- Add members:
- You can add Community members by assigning Profiles and Permission Sets to the Community. This gives administrators fine control over access.
- Members can receive a welcome email when the Community is published.
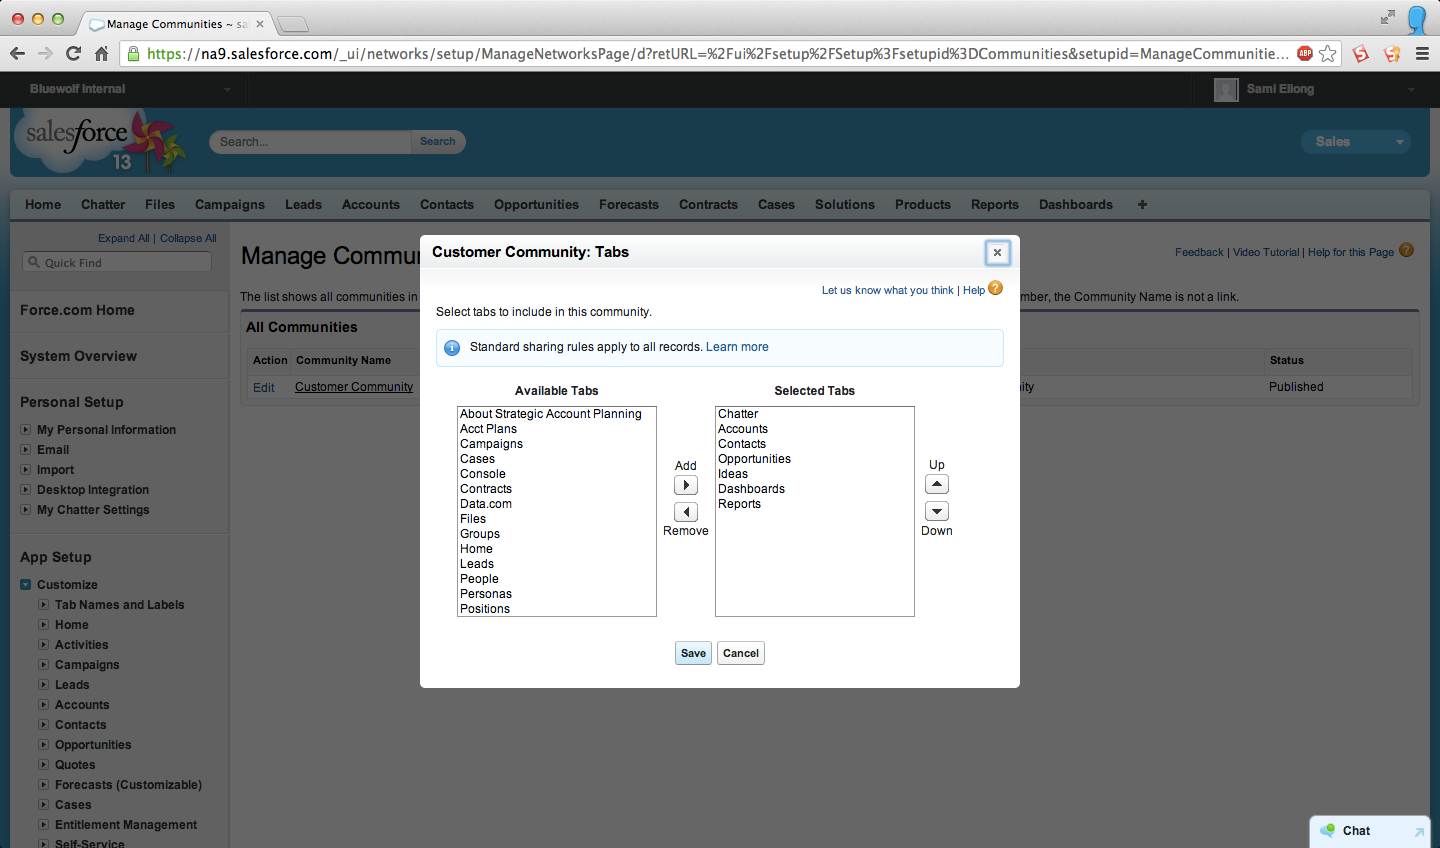
- Customize tabs
- Select the Tabs you want displayed in your Community. This will determine the records and functionality users have access to.
- The tabs you enable should be determined by the type of activity you’re performing in this community. For example, display Cases when in a Customer Support community or Opportunities in a Partner community.
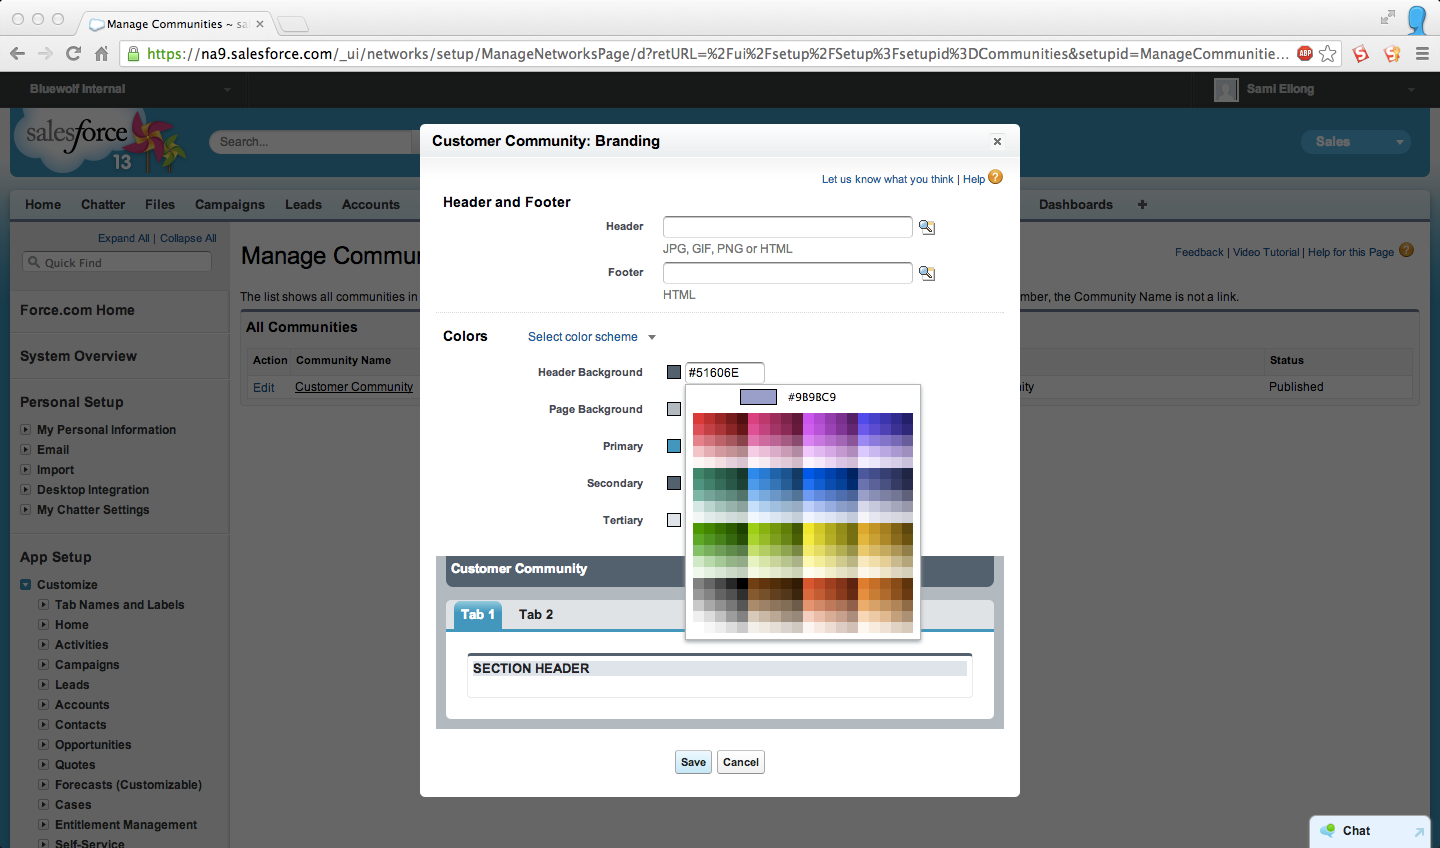
- Brand the community
- Give the Community your company’s look and feel by customizing the color scheme and adding your company logo.
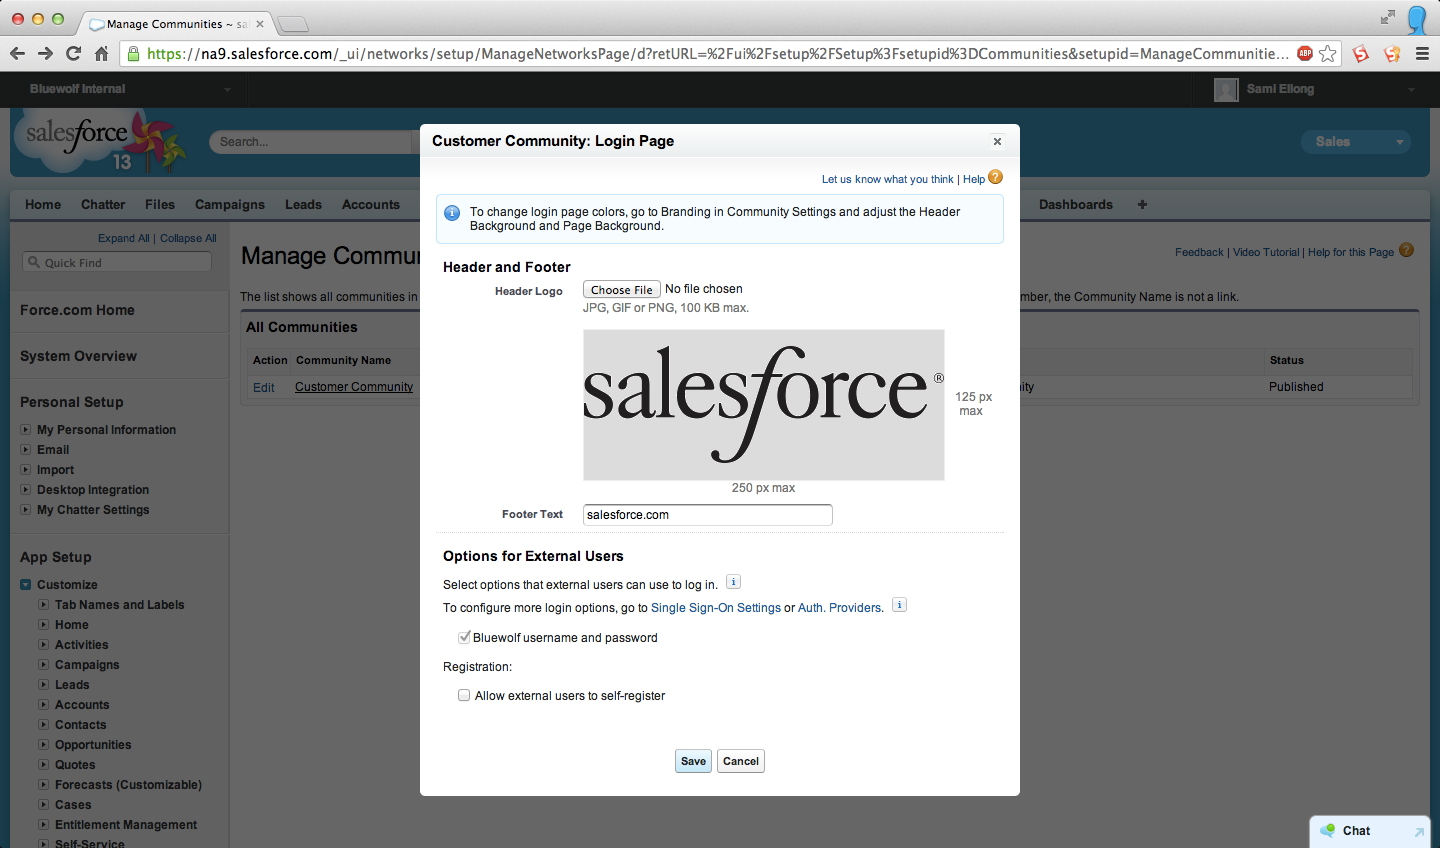
- Enhance the login experience
- Add your logo and footer to the standard login page.
- With additional customizations you can:
- Allow users to self-register.
- Enable Single Sign-On or use other identity providers such as Facebook to log users in.
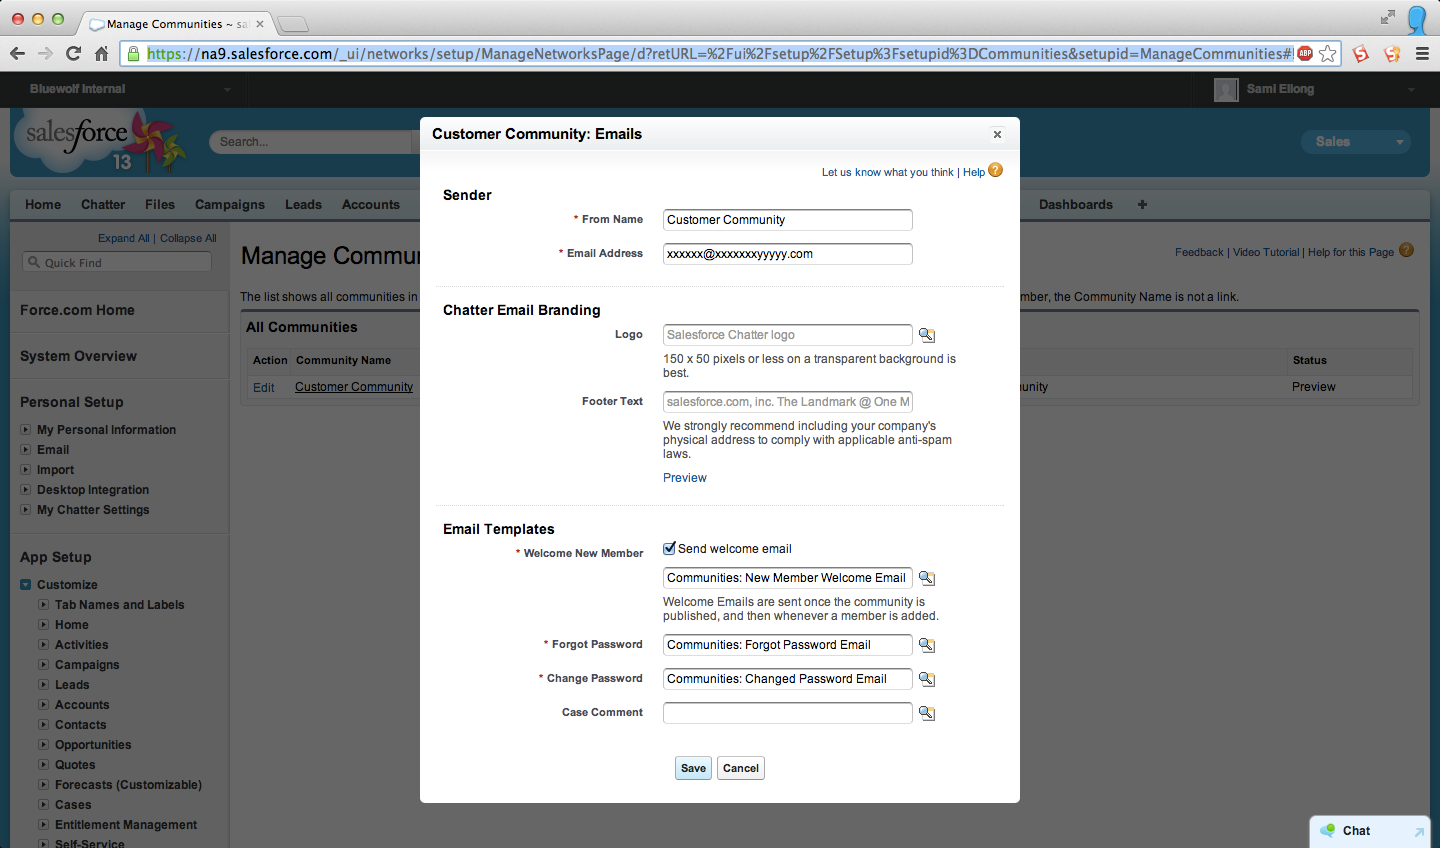
- Design email templates and settings
- Configure the look and feel and content of emails generated by the Community.
Create Community Users
After customizing and branding your Community, it’s time to create external users that will have access to it.
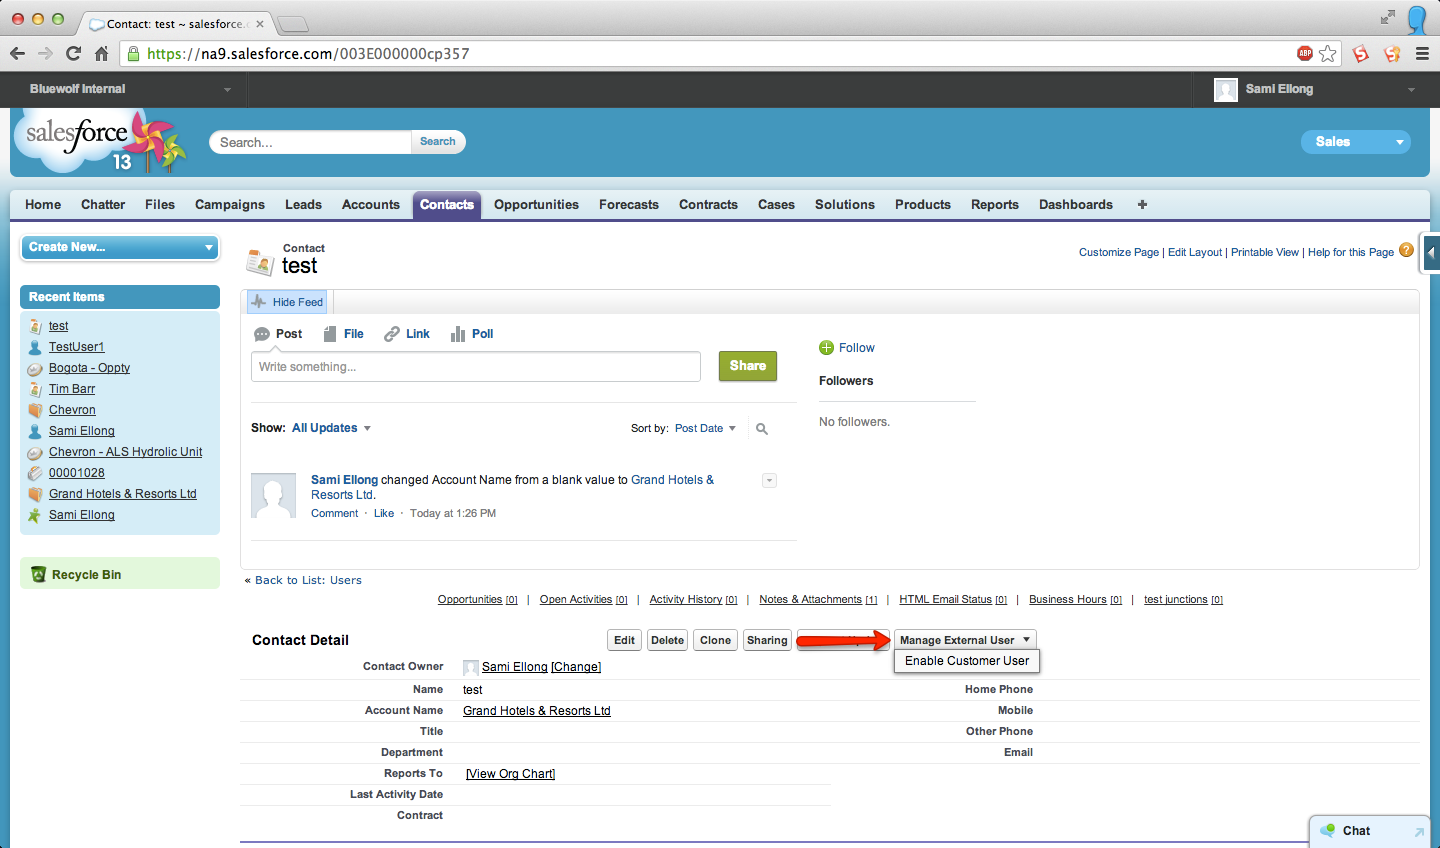
- Create a new Contact record or navigate to an existing one.
- On the detail page, click Manage External Users and select Enable Customer User.
- Create the external user and assign them to a profile, which has access to the recently created Community.
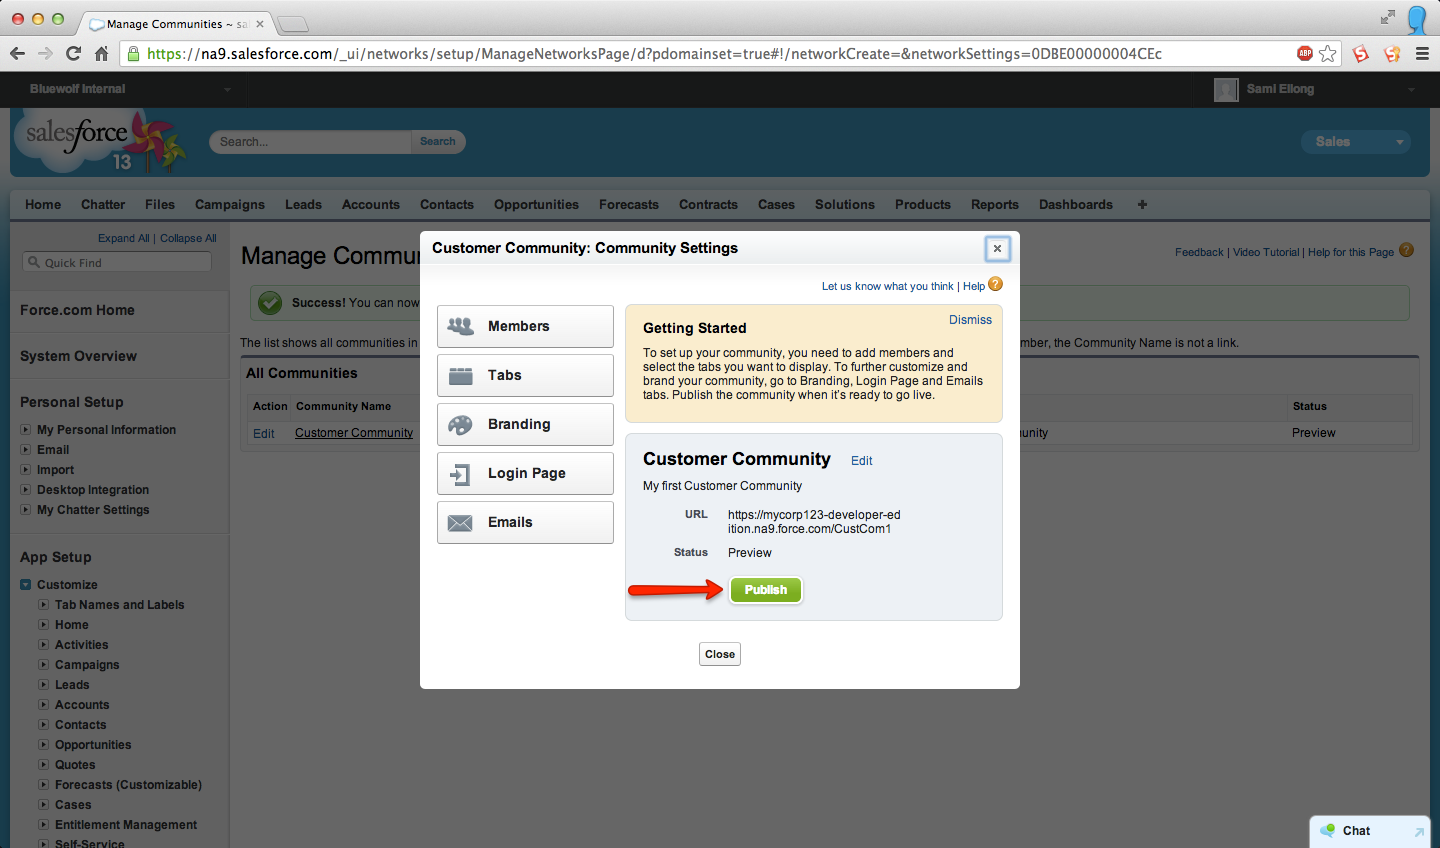
Publish
Once users have been created, it is time to publish your community. This is done by clicking on the Publish button in your community settings.
Engage
Congratulations! You now have a fully functional Salesforce Community. Use it to engage your Customers and Partners and bring a whole new level of collaboration to your organization. For more information on Salesforce Communities, check out these resources:
- Blog post, The End of Portals: The Dawn of Salesforce Communities
- Blog post, Salesforce Communities—Features And FAQs
- Recorded webcast, The Portal is Dead, the Rise of Salesforce Communities
See how Bluewolf can help you launch your Salesforce Communities, contact us.
Questions or comments? Leave a message below or connect with me on Twitter at @SamiEllong.


